Editing a view
To edit a view:
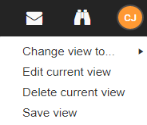
- Make sure the view you want to edit is selected by clicking the binocular icon, selecting Change view to, and then selecting the name of the view you want to edit.
- Next, select Edit current view.

- Edit any of the following information on the General tab:
- Show Employee Areas: Enable this checkbox if you want to just see employee areas
- Show Manager Areas:Enable this checkbox if you want to see manager or admin areas.
- Start on: Use the menu to select whether to display the Home or Schedule tab when this view is opened.
- Hide sidebar upon loading schedule: Enable this checkbox if you want to hide the sort and filter sidebar when the Schedule displays.
- Location: Use this menu to select the nearest location in your local time zone. All dates and times in the Schedule are converted to your local time.
- Auto-refresh options: Use this to enable auto-refresh on the schedule. The refresh interval can be set between 5 minutes and 1439 (24 hours)
- Edit any of the information on the Schedule tab:
- Show hours in time blocks: Enable this checkbox if you want to show the numbers of hours in the time block..
- Do not show totals: Enable this checkbox if you do not want to display quantity totals on the bottom and right of the Schedule.
- Show rows for all sort items: When enabled, this feature allows you to view all possible items on the Schedule when sorting by a particular category (such as Location or Area), even if those items are not attached to time blocks. For example, if you sort by Location, all possible locations will display on the Schedule, even those that do not appear in any time blocks. This feature helps when dragging and dropping time blocks (such as assigning a new employee to a time block). This feature does not take effect if you are sorted by Start Hour or if you are sorted by more than one item.
- Show double scheduling alert: Enable this checkbox if you want an alert to display when employee is assigned to more than one time block at the same time.
- Show "Viewed" in time blocks: Enable this checkbox if you want to see if the employee viewed the assigned time block.
- Show rule conflicts in time blocks: Enable this checkbox if you want to see every eliminating rule that a time block is breaking. See Show Conflicts for more information.
- First sort column width: When you use the sorting feature in the Schedule tab, you can select to sort by more than one column. This field allows you to set the width of the first column in pixels.
- Second sort column width: This field allows you to set the width of the second sort column in pixels.
- Third sort column width: This field allows you to set the width of the third sort column in pixels.
- Width of date columns (Multiple weeks): This field allows you to set the width of date columns on the Schedule tab in pixels when multiple weeks are displayed. When a single week is displayed, the column widths are computed automatically and this setting is ignored.
- Edit any of the information in the Time Block Details tab:
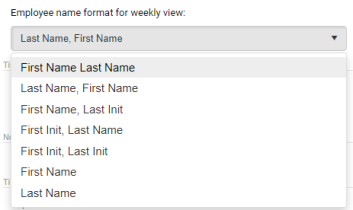
- Employee name format for weekly view: From the drop down menu select which format for the employee name.

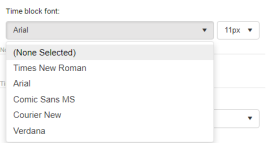
- Time block font: Allows you to select the font and size of text for the time block.

- Show Notes in time blocks: Enable this checkbox if you want to have the notes appear in the time blocks.
- Show Manager Notes in time blocks: Enable this checkbox if you want to have the manager notes appear in the time blocks.
- Show Confirmed/Declined in time blocks: Enable this checkbox if you want to know if the time block has been confirmed or declined..
- Suppress times: Allows you to select how you want to see start and end times in the time block.
- Suppress break times: Allows you to select how you want to see start and end times of the break.
- Show [category name] in time blocks: For each category, you can select to show, hide, or show the abbreviated name for the category item in time blocks.
- Show abbreviated category name in time blocks: Enable this checkbox if you want to display an abbreviated name for the category in time blocks before the category item. For example, if this was for the Time of Day category, this could display “TD:” before the category item on time blocks.
- Employee name format for weekly view: From the drop down menu select which format for the employee name.
- Edit any information on the Color tab
- Color Scheme: Allows you to select the color scheme for the Calendar. The color scheme determines the background color of the time blocks. You can choose from standard or by one of the time block categories. For example, if you choose employee the time blocks would be colored by employee.
- Standard View: In the standard color scheme time blocks are viewed in one of the following categories with the stated default color for each:
- Open: Time blocks that are not assigned to anyone. They are shown in red
- Unusual: They are assigned time blocks that do not have a match in ANY of the active templates. They are shown in yellow
- Other: Any time blocks that do not meet the criteria of either of the above two. They are shown in white
- Highlight unusual shifts: Enable this checkbox if you want unusual shifts to be highlighted.
- Color for unusual shifts: Allows you to override the color for unusual shifts to a color of your choice.
- Color for open shifts: Allows you to override the color for open shifts to a color of your choice.
Override color scheme for unusual shifts: Allows you to override the category color scheme to still highlight the usual shifts. Note: you must have highlight unusual shifts checked for this feature to work.
Override color scheme for open shifts: Allows you to override the category color scheme to still highlight the open shifts.
- Standard View: In the standard color scheme time blocks are viewed in one of the following categories with the stated default color for each:
- Color Scheme: Allows you to select the color scheme for the Calendar. The color scheme determines the background color of the time blocks. You can choose from standard or by one of the time block categories. For example, if you choose employee the time blocks would be colored by employee.
- Edit any information on the Sort tab
- Use the menu to select the category item you want to sort by.
- Add or remove additional category items to sort by clicking the plus or minus icons, respectively and then select the category item from the menu.
- The sort feature allows you to sort by up to three category items.
- You can also change the sort within the Calendar area
- Edit any information on the Filter tab
The filter feature allows you to only view time blocks that are assigned to specific category items or users.
For example, if you want to view time blocks for only your night shift, you would open the Time of Day filter, and remove the check mark for every time of day except for Night.
- You can also change the filter within the Schedule area
- Edit any information on the Yearly View tab
- Values in each day: The content of each day on the calendar
- Number of time blocks- The count of time blocks on the day
- Number of months in view: The number of monthly calendars to show at once
- Values in each day: The content of each day on the calendar
- Click Change View.
Copyright © 2021 Program Works